
Importing Employee Costs from Paylocity
Paylocity + CostAllocation Pro can be a great combination to track and allocate payroll costs by customer/class. These instructions will provide guidance on which Paylocity reports work best with CostAllocation Pro.
---
Downloading the Labor Distribution Report from Paylocity
The Paylocity report that works best for importing employee costs is called the Labor Distribution Data Export. This report can be found in the HR & Payroll module of Paylocity.
Step 1: Locate the Report in Paylocity
1. Log into your Paylocity account.
2. Navigate to the HR & Payroll module.
3. Under the Reports & Analytics tab, click Reporting.
4. In the search bar, type **Labor Distribution Data Export** and select the report.
Step 2: Apply the Necessary Filters
1. Use the Payroll Filters to select the appropriate pay period.
2. In the Cost Center Filters section, ensure that all cost center levels (if any are displayed) are suppressed to prevent unnecessary data from being included.


Step 3: Export the Report
1. After applying the necessary filters, click Export.
2. Select Excel as the export format.
3. Save the file to your computer for use in CostAllocation Pro.
---
Modifying the Header Row for Import
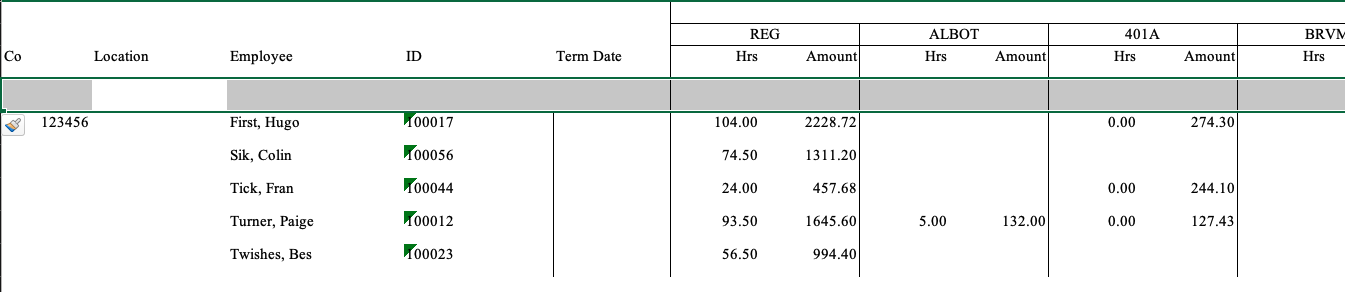
This report lists summarized totals for each employee by pay code. While the format of this report is mostly compatible with CostAllocation Pro, a modification to the header row is required before import.
Understanding the Issue
When exported from Paylocity, the report includes two columns for each pay code:
- One labeled "Hrs" (representing hours worked).
- One labeled "Amount" (representing payroll costs).
CostAllocation Pro requires a single header row as the first row of the import file. To resolve this, a new header row must be inserted where the pay code name is combined with the corresponding column headers.

Steps to Modify the Header Row
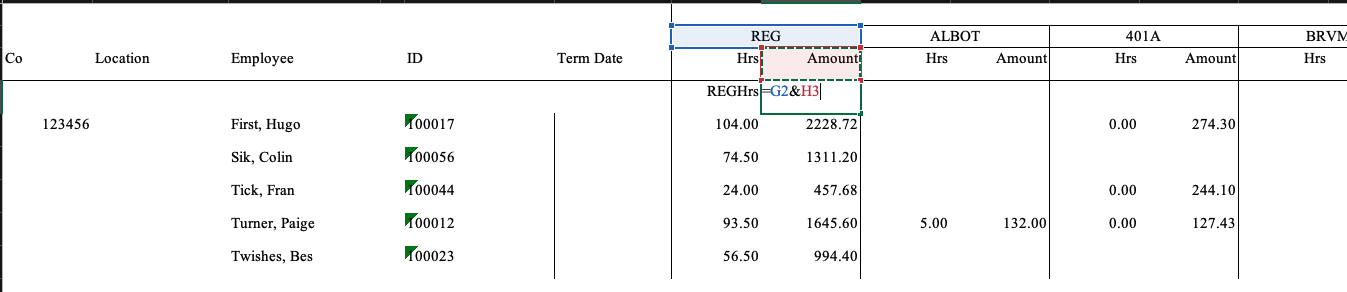
1. Insert a new row below the existing headers.
2. Use a formula to combine the pay code name with the column headers. For example:
- In the first column where "Hrs" appears, use: `=A2 & " Hrs"`
- In the first column where "Amount" appears, use: `=A2 & " Amount"`
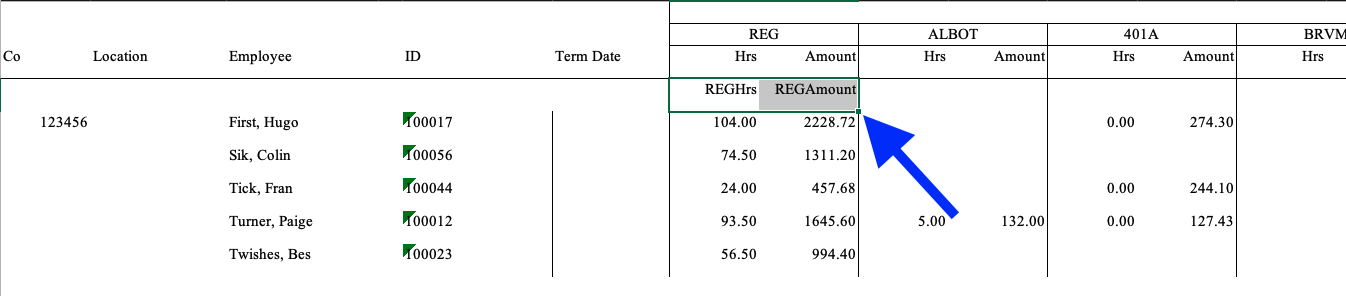
3. Drag the formula across all pay code columns using the fill handle (black square at the bottom right of the selected cells) to apply the formula to the entire header row.
4. Convert the formula results into static values:
- Select the new header row.
- Copy and then Paste Values to replace formulas with static text.
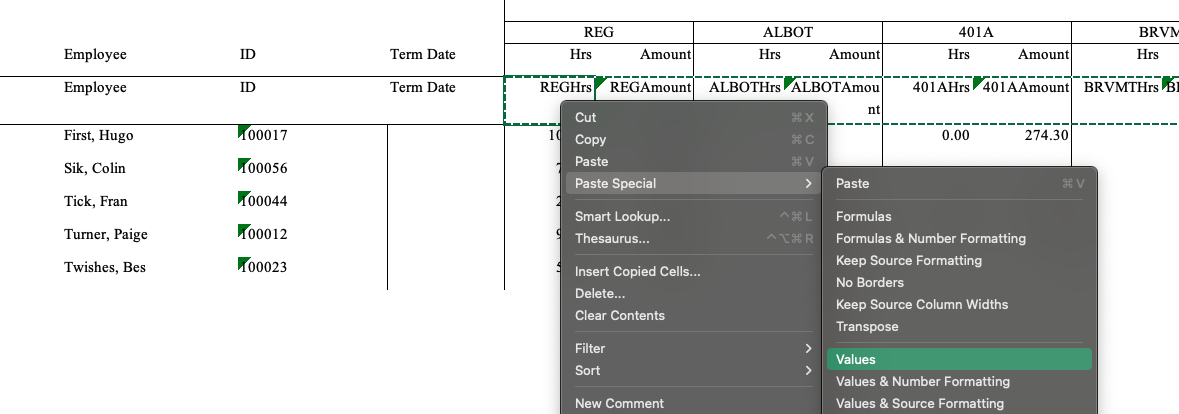
5. Delete the original header rows so that the new single-line header is at the top.
Finalizing the File
After completing these modifications, your file should now have a single header row that correctly identifies each column by pay code and type (e.g., "Regular Hrs", "Regular Amount").

This file is now ready to be uploaded to CostAllocation Pro.