
How to Verify Your QuickBooks Email Account to Connect to CostAllocation Pro
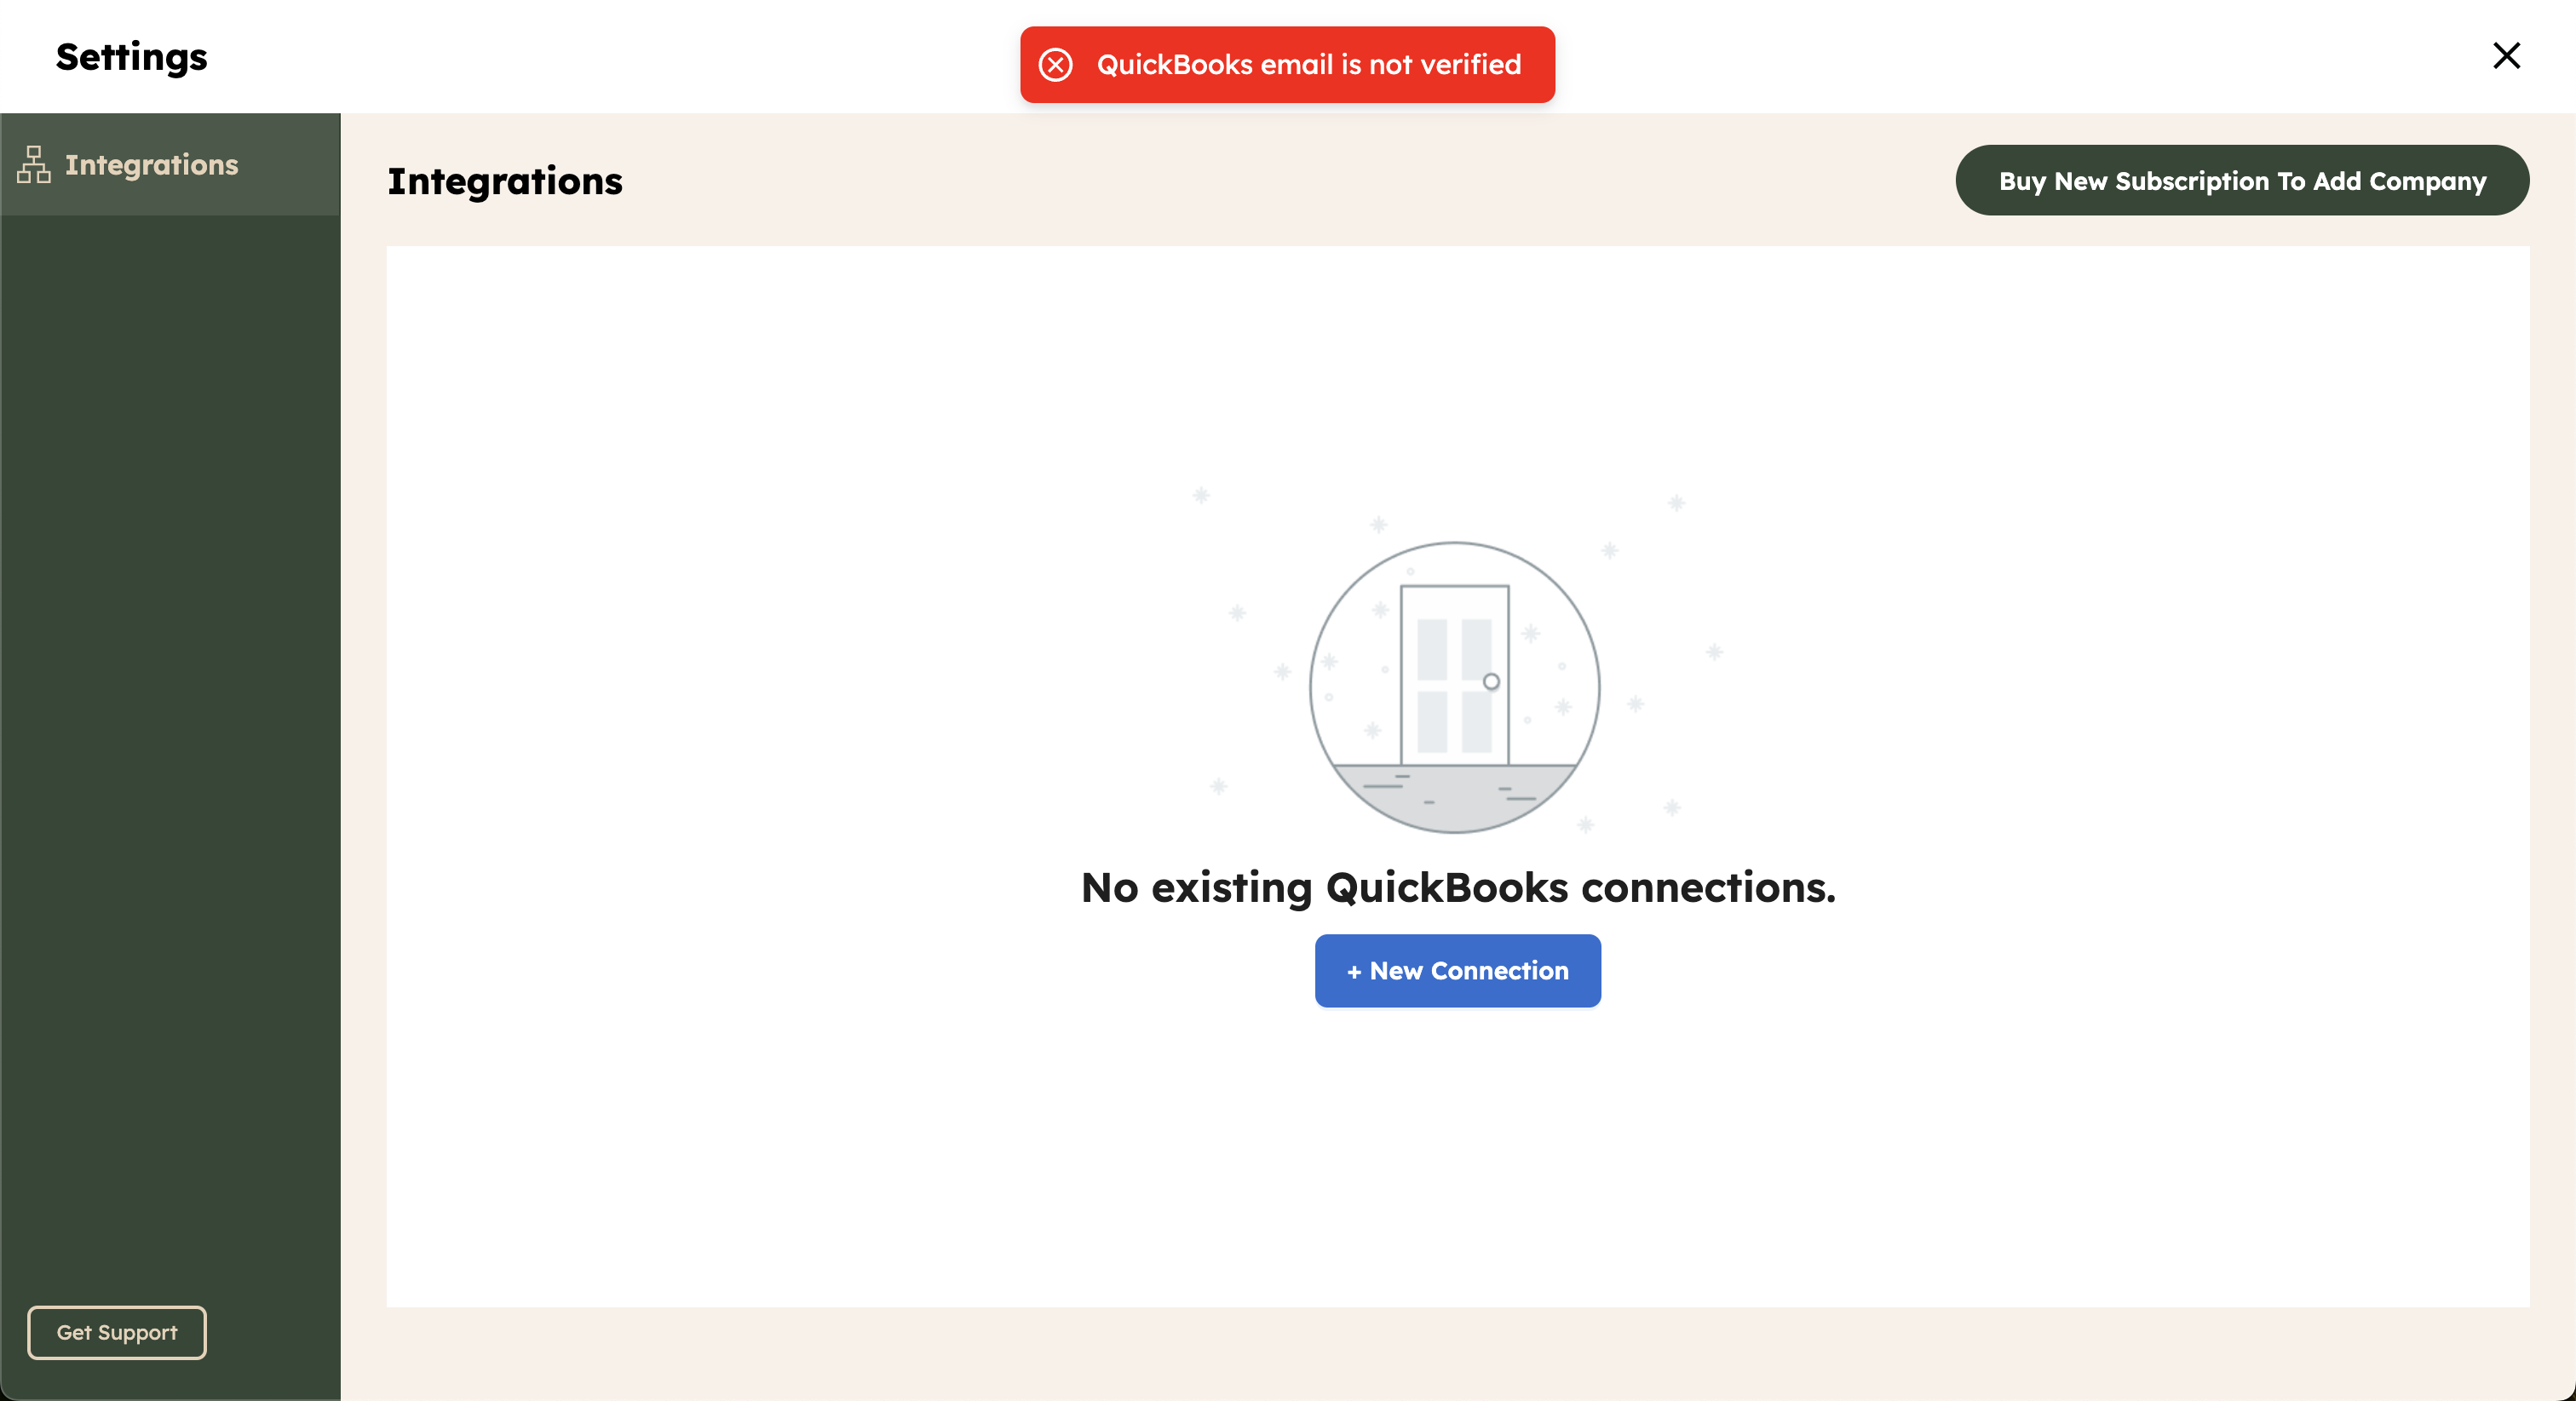
If you're trying to link your QuickBooks account to CostAllocation Pro and are receiving an error saying your QuickBooks email account isn’t verified, don’t worry—it's a common issue. This typically happens when QuickBooks needs to confirm that your email address is legitimate and active before allowing you to integrate with third-party software.
Here’s a step-by-step guide to help you resolve this issue and verify your QuickBooks email account:
Step 1: Log in to Your QuickBooks Account
- Open a web browser and go to the QuickBooks login page.
- Enter your email address and password associated with your QuickBooks account.
- Click Sign In.
Step 2: Check for Email Verification Status
Once you're logged in, follow these steps:
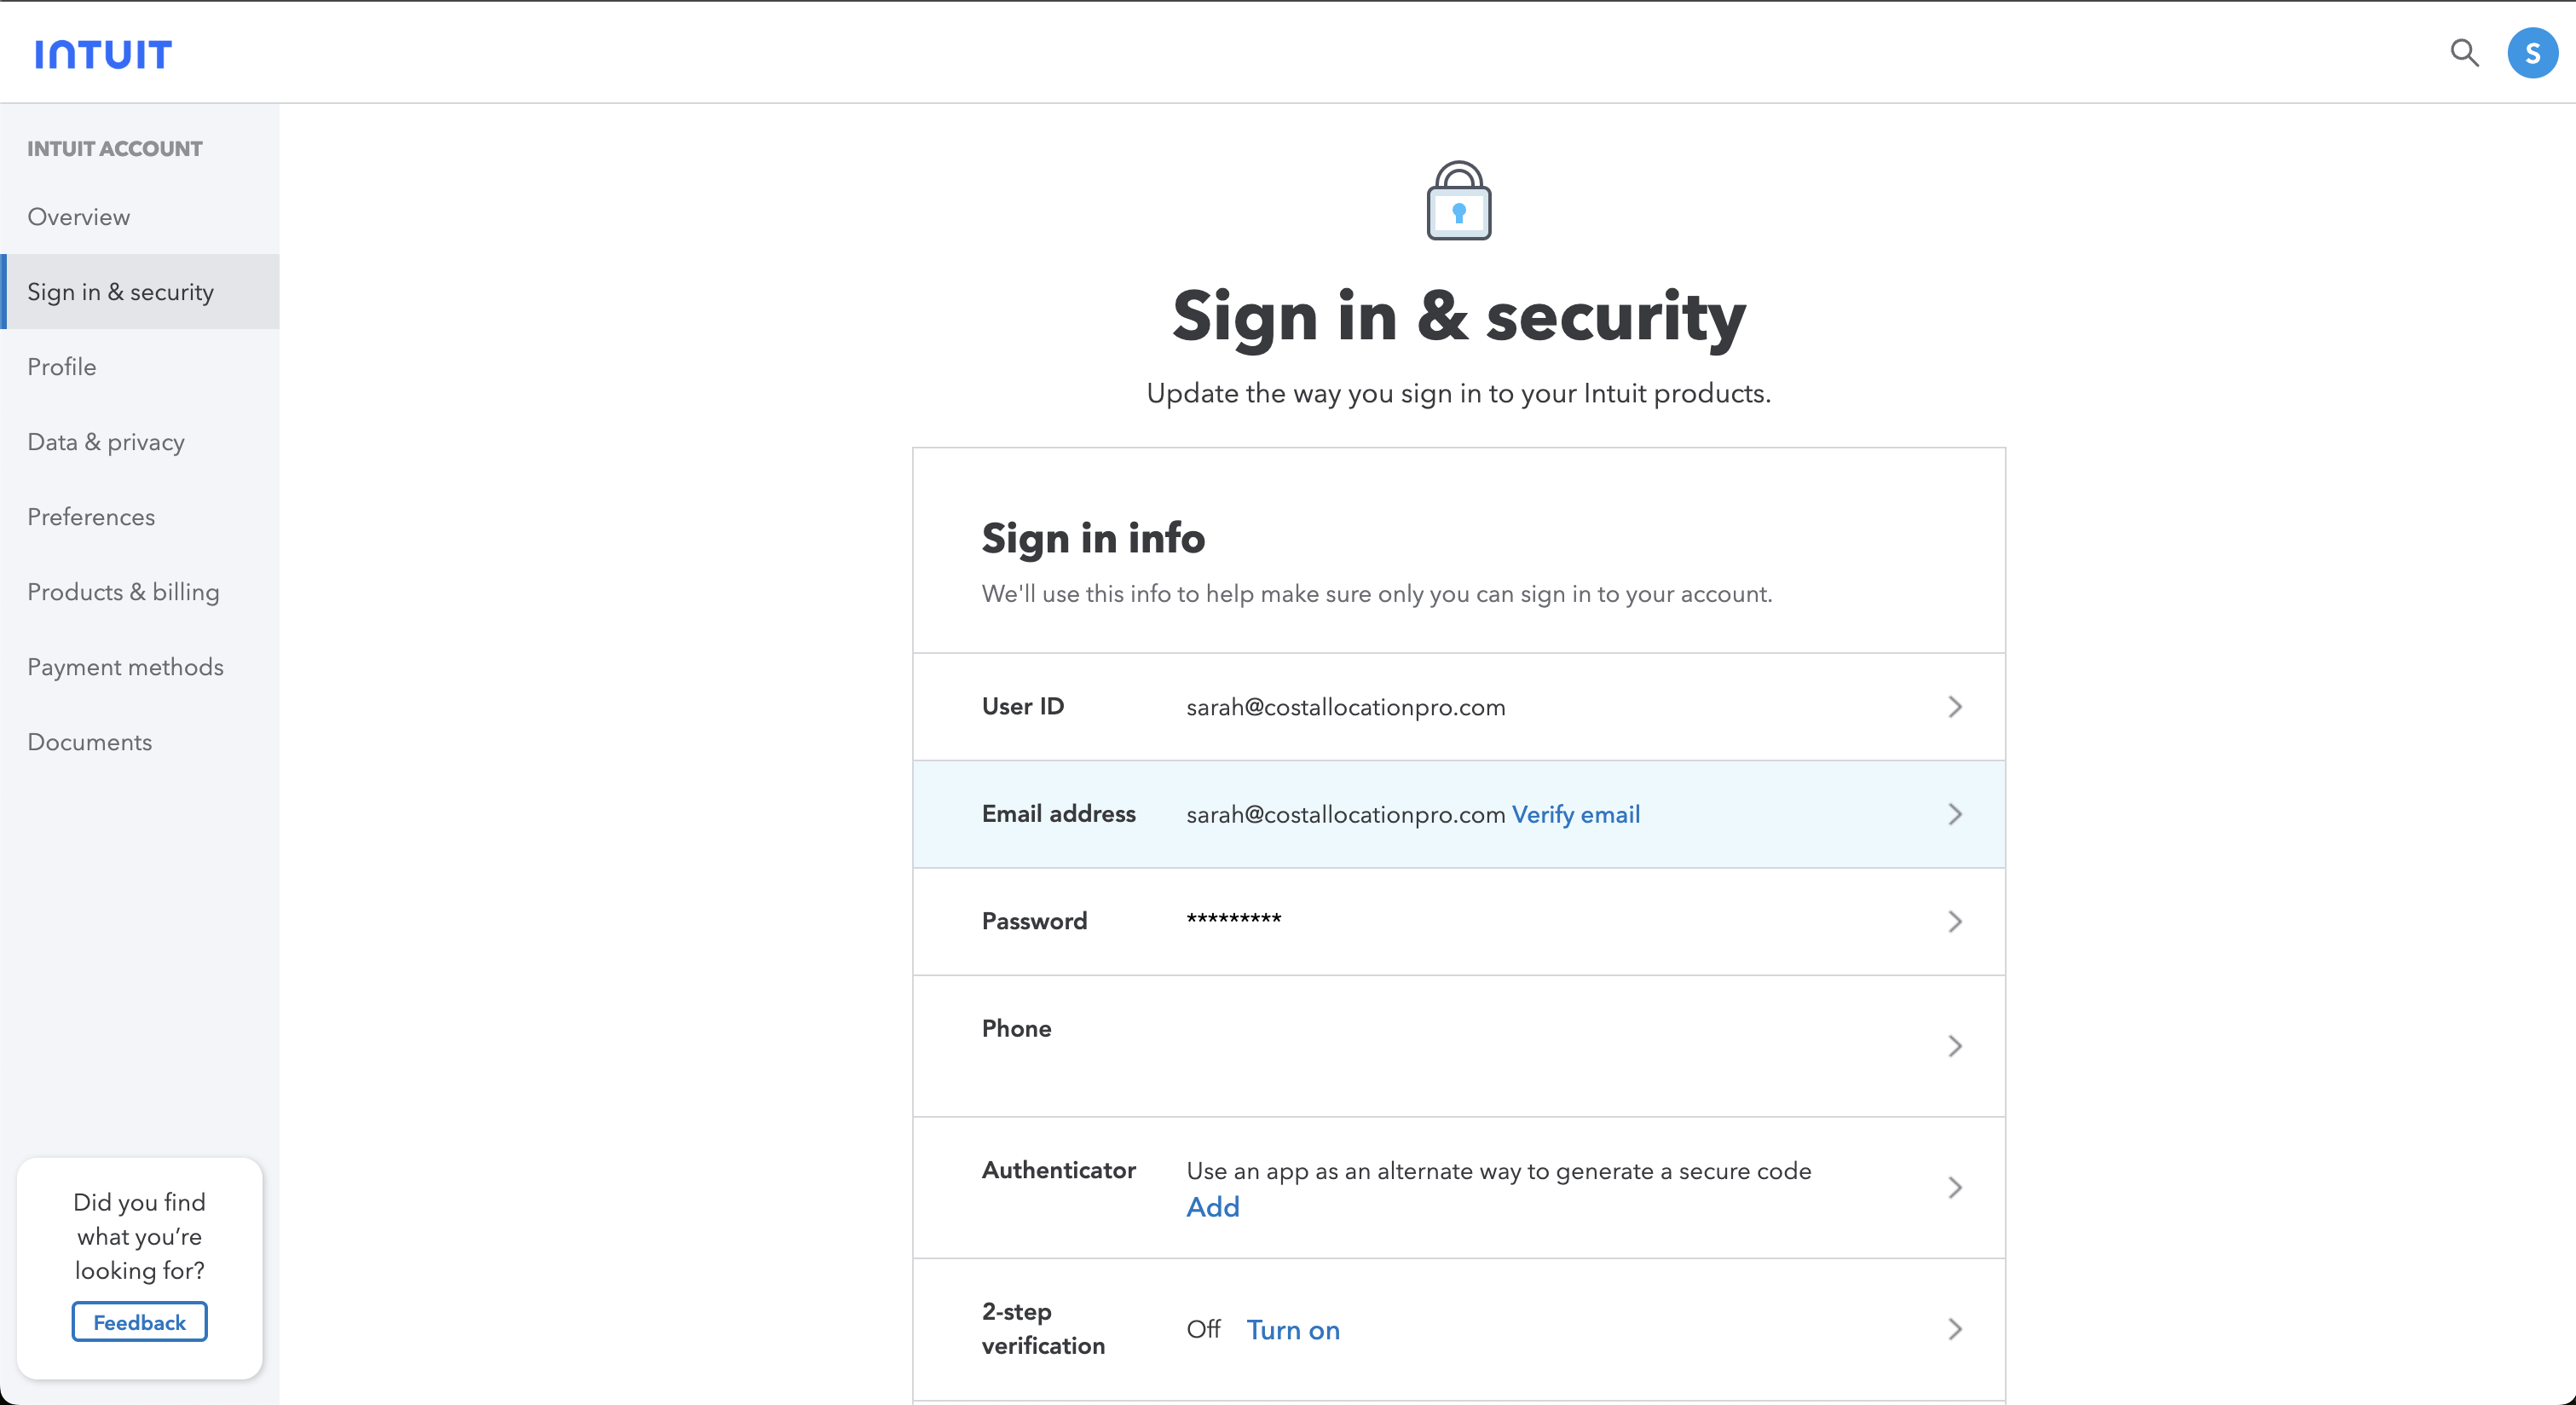
- Click on your profile picture in the upper right corner of the screen and navigate to Manage Your Intuit Account.
- Click on Sign in & Security.
- Select the Company tab.
- Look for the Email section right below your user id.
- If your email is not verified, you'll see a message saying “Verify Email.”
Step 3: Verify Your Email Address
- If your email is not verified, click the email section and then click the button Send Verification Email.
- Go to your email inbox (the one linked to your QuickBooks account).
- Look for the verification email from QuickBooks (it may be from "Intuit" or "QuickBooks").
- Open the email and click the Verify my email button inside.
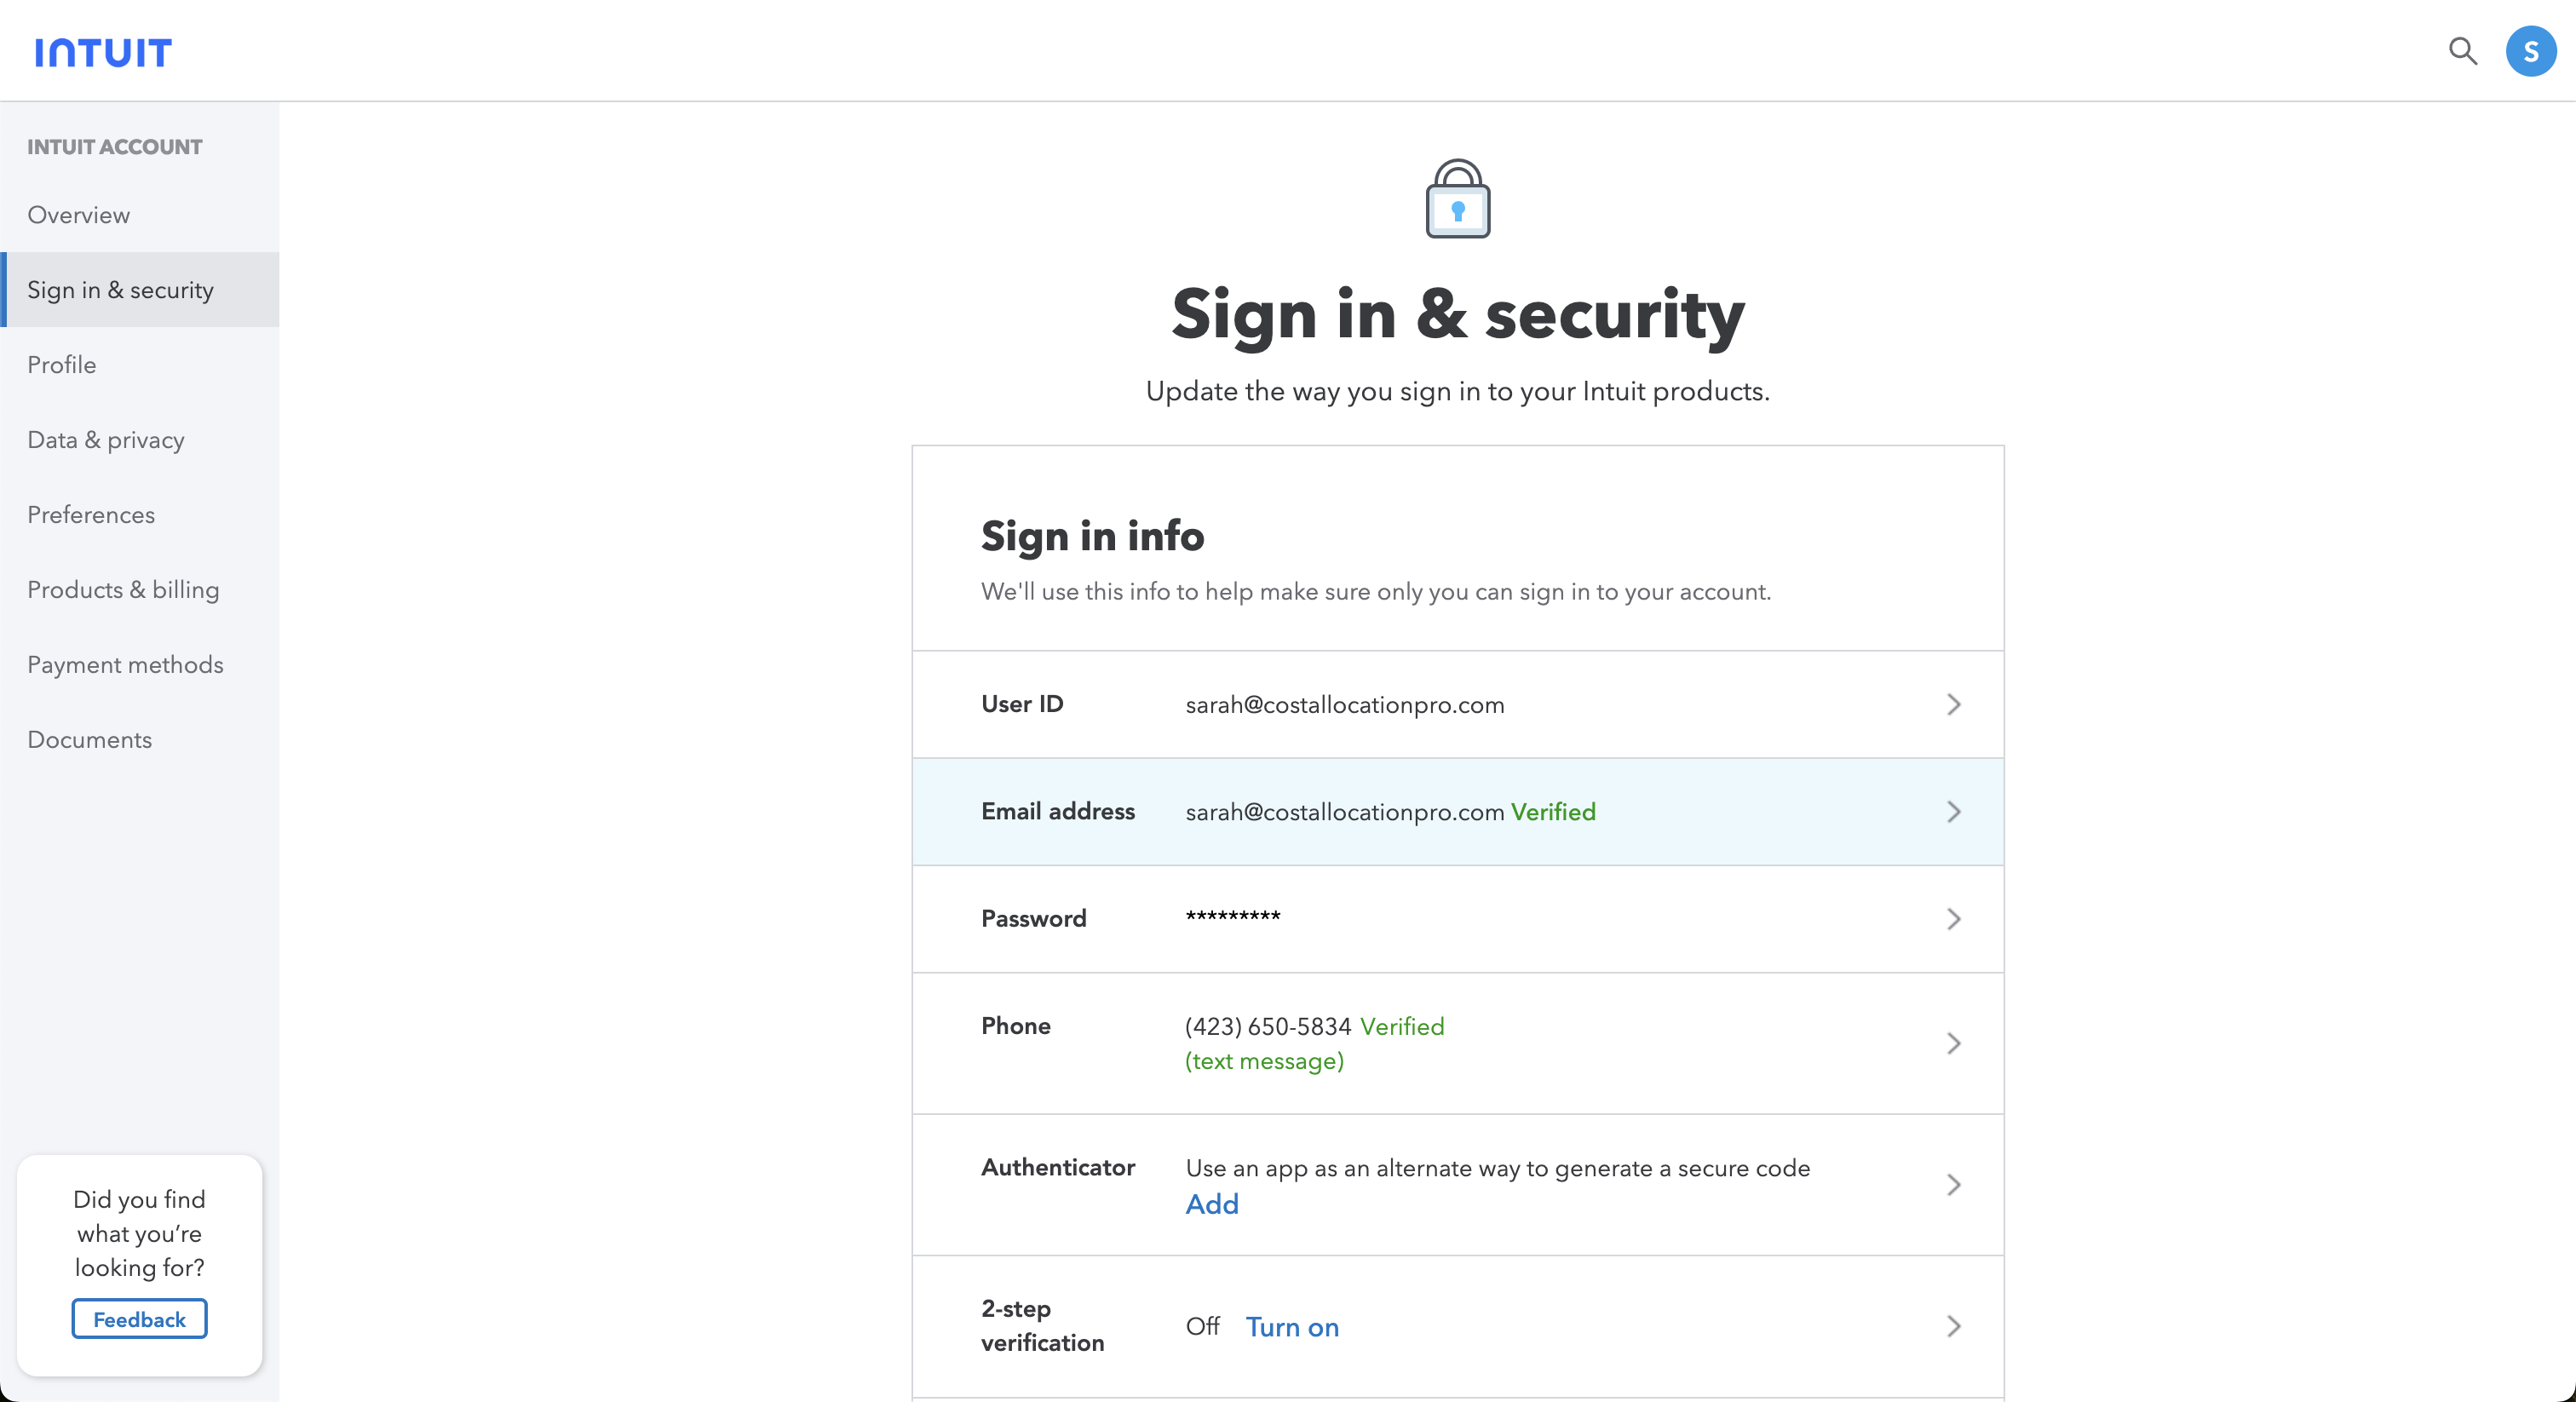
- After completing this step, return to the Sign in & Security page to confirm your verification is complete.
Step 4: Ensure No Issues with Your Email Service
If you didn’t receive the verification email:
- Check your Spam/Junk folder—sometimes emails from QuickBooks end up there.
- Make sure that the email address you're trying to verify is correct. If necessary, try updating it.
- If you're still not receiving the verification email, double-check that your email account is active and able to receive messages.
Step 5: Return to CostAllocation Pro and Re-try the Integration
Once your email is successfully verified, go back to CostAllocation Pro.
- Retry the integration process.
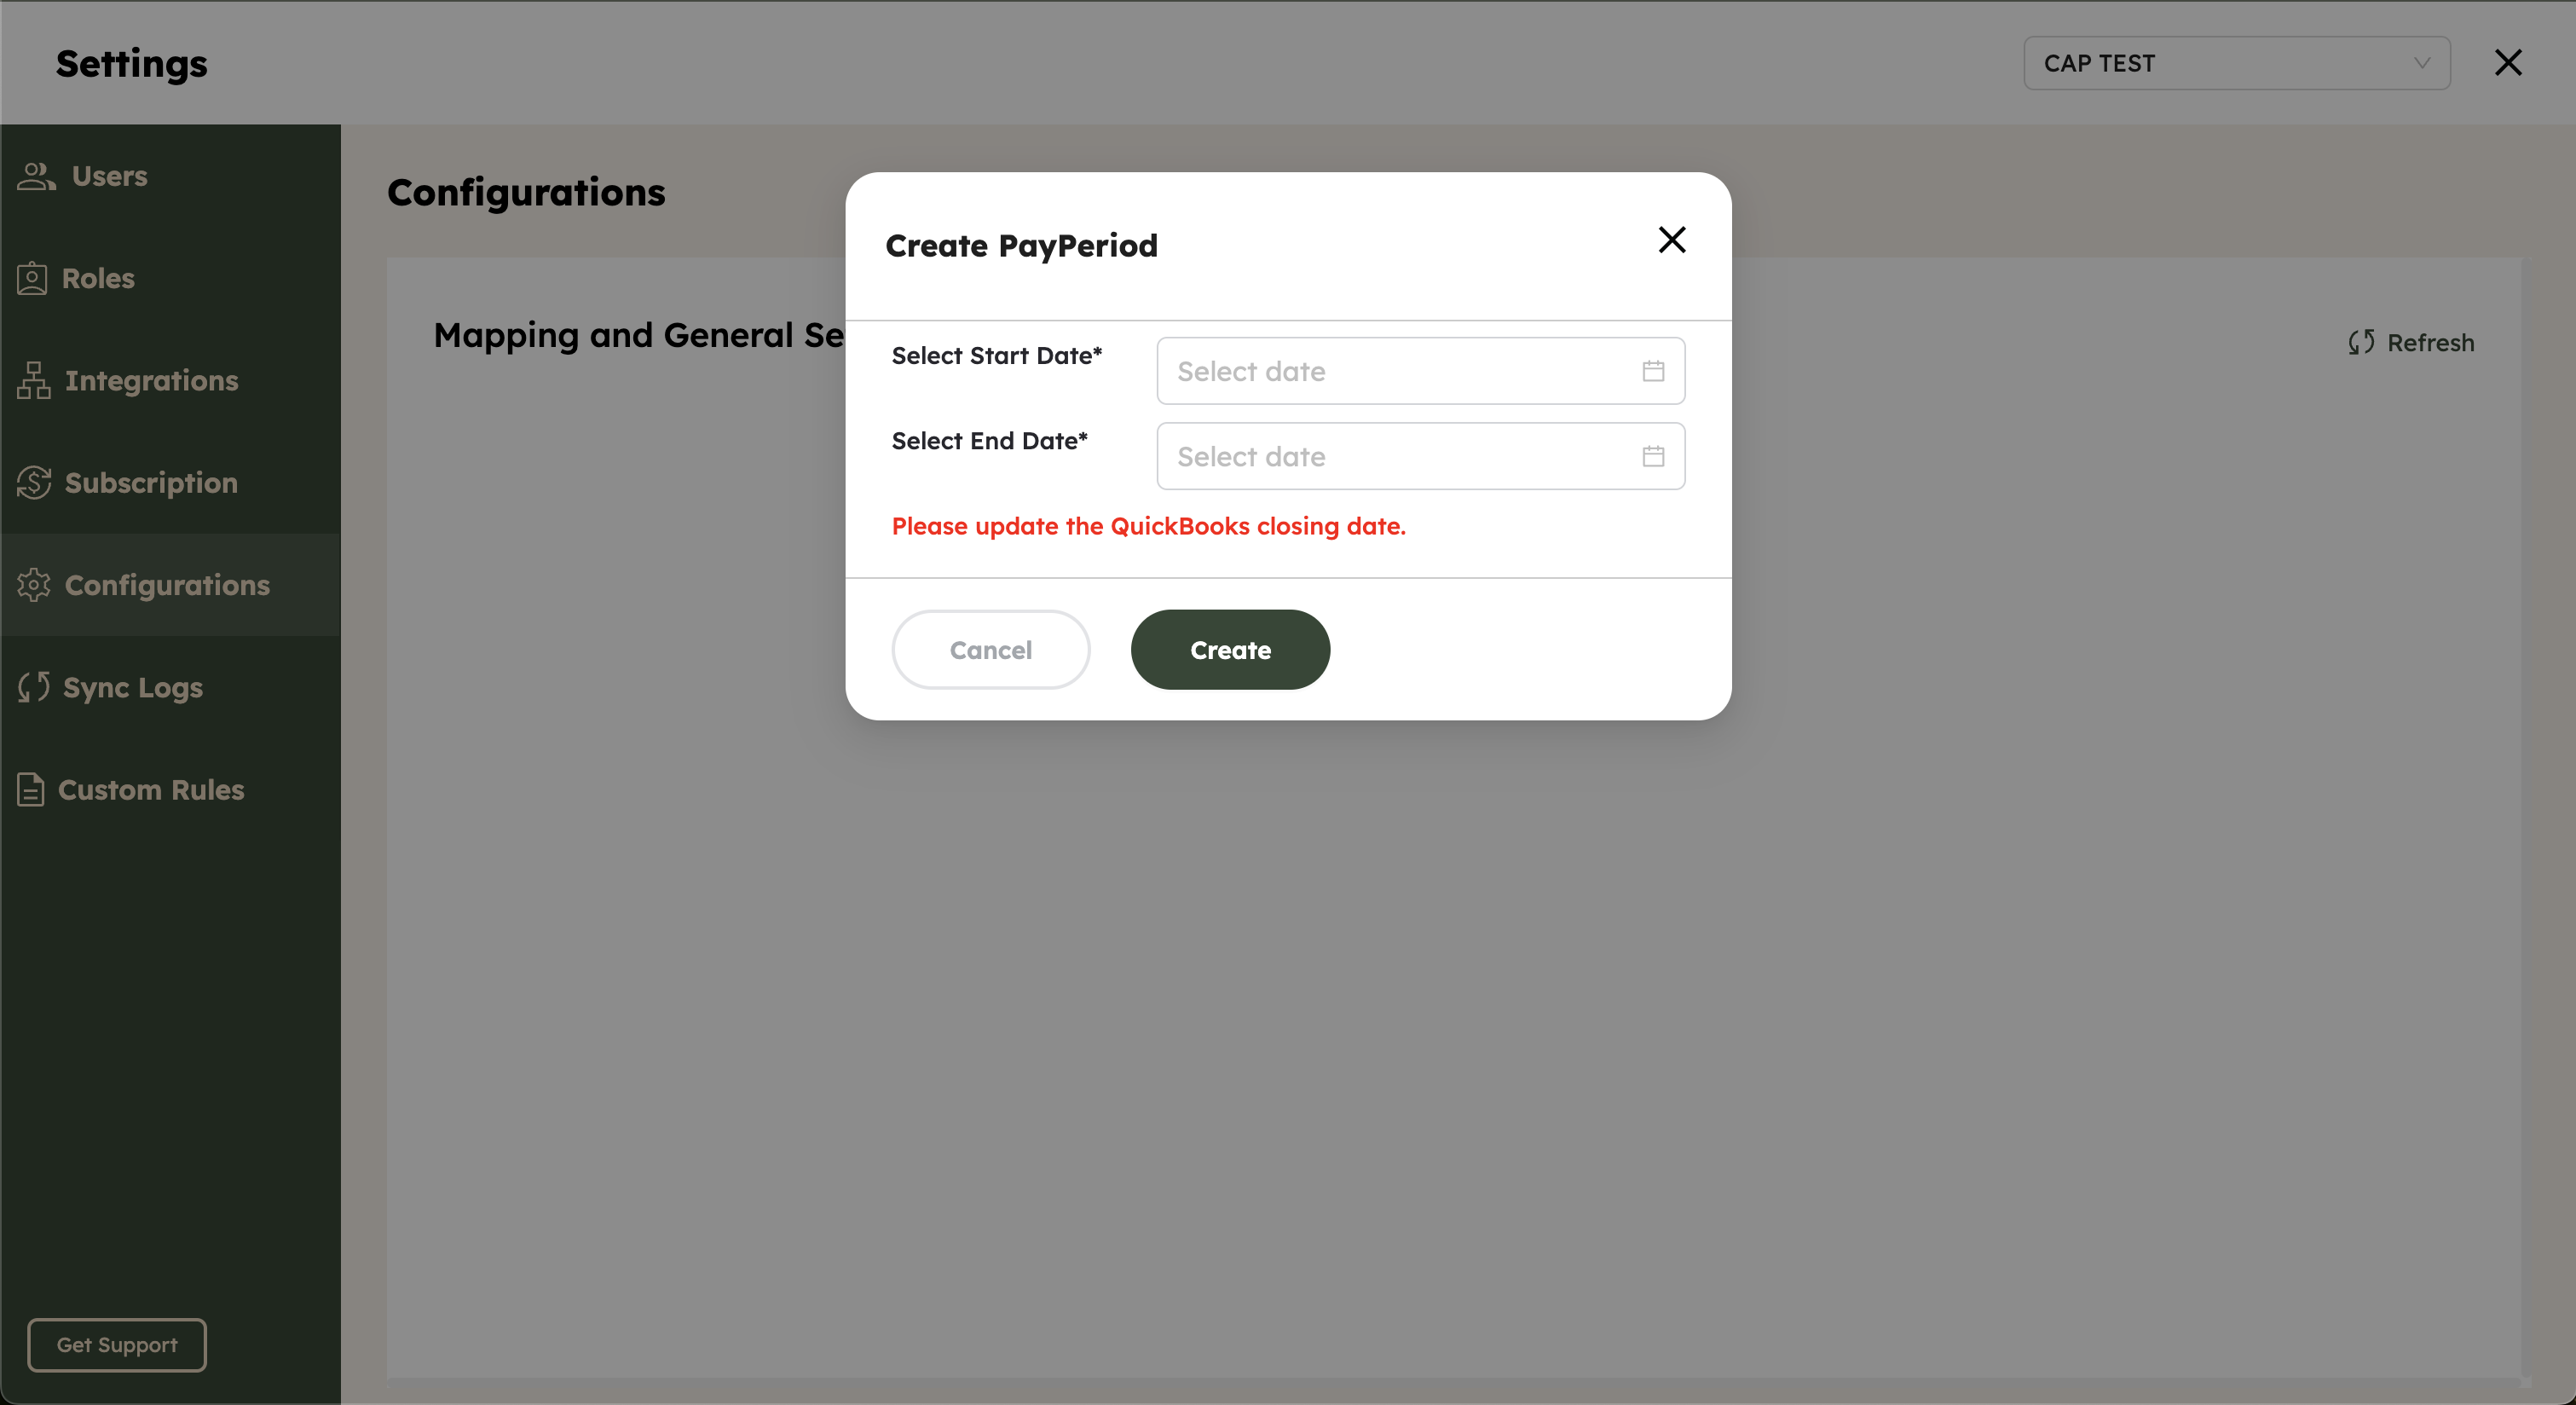
- This time, your QuickBooks email should be recognized as verified, and the connection should succeed. If successful, you should see a popup asking to Create PayPeriod.
Step 6: Troubleshooting (If the Email Still Isn't Verified)
If you’ve followed the steps above but are still facing issues:
- Clear your browser cache or try using a different browser to log in to QuickBooks.
- Log out of QuickBooks, then log back in and check the email verification status again.
- Contact QuickBooks support: If the problem persists and you can’t receive the verification email or still can’t connect your accounts, it's a good idea to contact QuickBooks support for assistance. You can reach them via:
- Phone: Call QuickBooks support at 1-800-4INTUIT (1-800-446-8848)
- Chat: Visit the QuickBooks Help Center and initiate a chat session for real-time support.
Conclusion
Verifying your QuickBooks email account is crucial for connecting QuickBooks to CostAllocation Pro.
By following these steps, you should be able to verify your email and resolve the issue of connecting your QuickBooks account to other software. If you're still having trouble, don't hesitate to reach out to us for additional help.